cPanel to DirectAdmin Migration easy method.
Migration between different hosting panels is always a headache for everyone. When it comes to external tools, the process may get hard. Unlike DirectAdmin to cPanel migration, cPanel to DirectAdmin Migration will require some external tools. With proper documentation, we can make this simple.
There are some things that we need to make sure before starting the migration.
- The DirectAdmin server should have atleast the same version of components.
- Make sure the username is not more than 8 character long. Otherwise, the package restore will give errors
- DirectAdmin License should be activated before the migration
- Availability of IP Address is a priority.
- Double check the database connectivity after the migration
Once you have made sure the above checklist, we can start the account migration. As I have mentioned earlier, this process will require external tools.
On the cPanel server, complete the following tasks.
- Download the tool for cPanel to Direct Admin Account Conversion and extract it
wget https://www.pusathosting.com/file/da.cpanel.import.9.4.tar.gz
- Create the following directories for the conversion of the account
mkdir import export
- Create account backup of the cPanel user and copy it to the import Directory
cPanel script will help us to create the user backup.
/scripts/pkgacct username
This command will generate the account backup for you. The backup file will be saved to the current working directory. We need to copy it to the import directory we created earlier. If we do the backup creation from the import directory, we can skip the copying part
- Navigate to the extracted directory of the account conversion tool and edit the defaults.conf file to match the IP address and name servers to find your DirectAdmin server. You can use Google DNS as ns1 and ns2 in the conf file and save the configuration
- Once is is completed, run the perl script using the below command
perl da.cpanel.import.pl
The script will have the option to copy the converted file to the DirectAdmin destination server.
Proceed with the running the script. It will ask whether to copy the converted file to destination server. Provide the Direct Admin server details exactly as ask asked by the script. The tool will convert the backup file and copy it to the DirectAdmin server to the path “/home/admin/user-backups”

This process will complete the file conversion.
The next thing is to restore the file in the DirectAdmin server directly from the DirectAdmin GUI.
- Log in to DirectAdmin Dashboard
https://servername.domain.com:2222
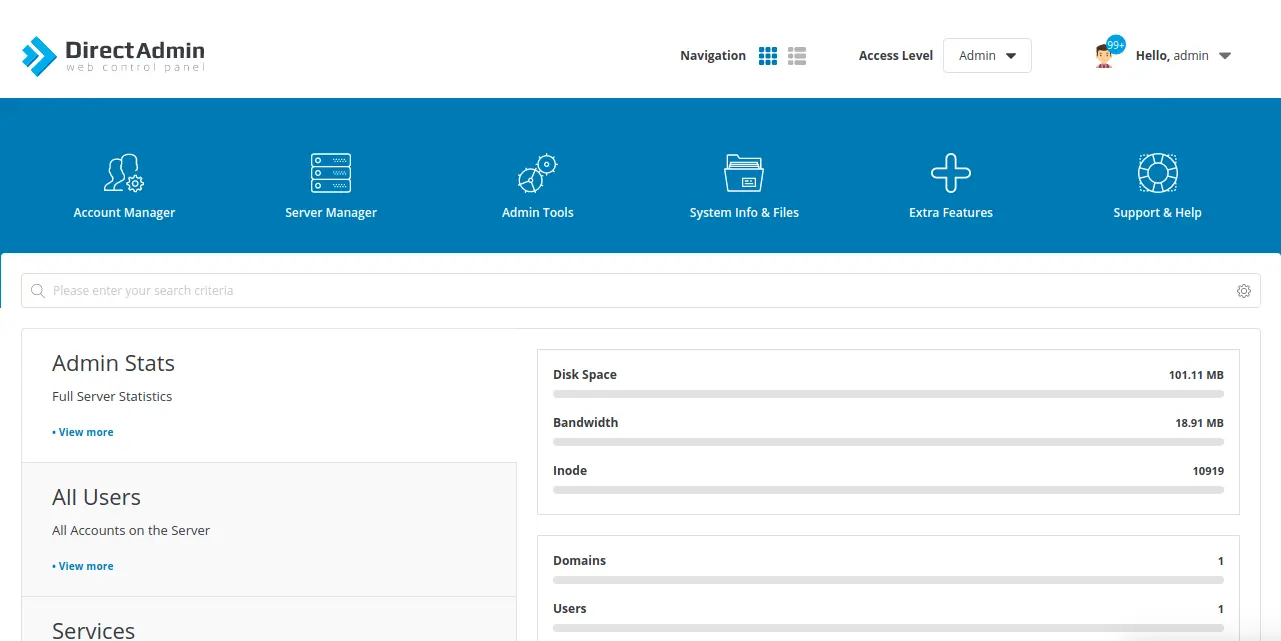
- The Home page of the interface will look like the following screenshot.
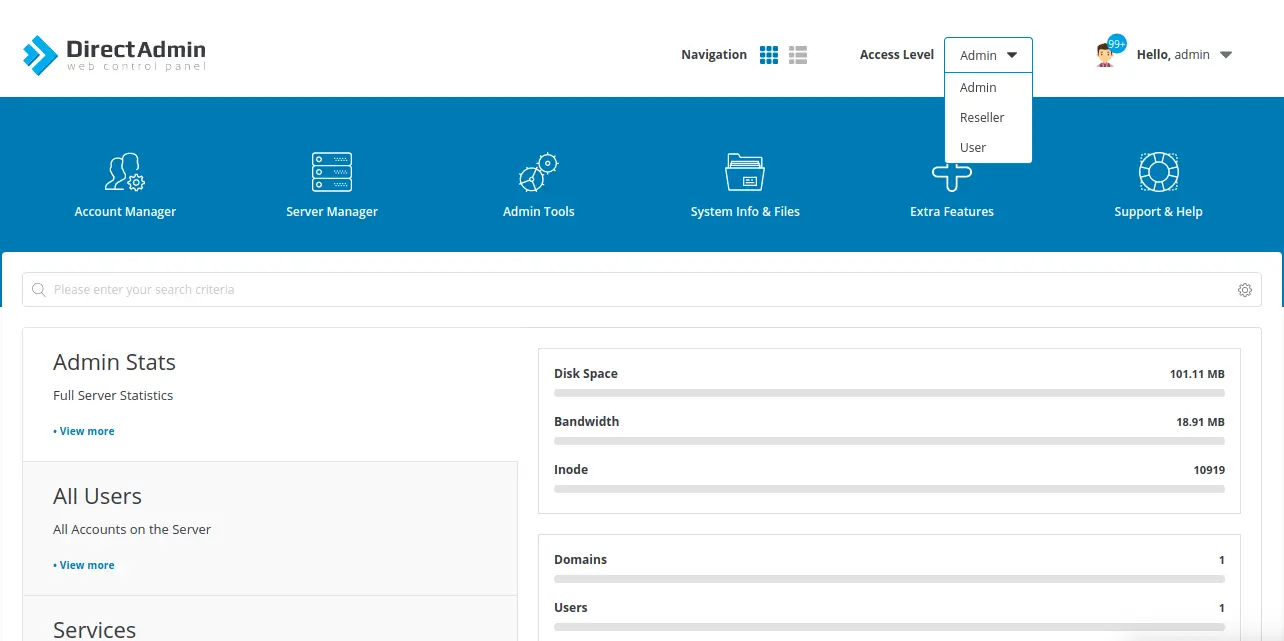
- The account restore option is available in the Reseller Access Level. You can switch the access level as below
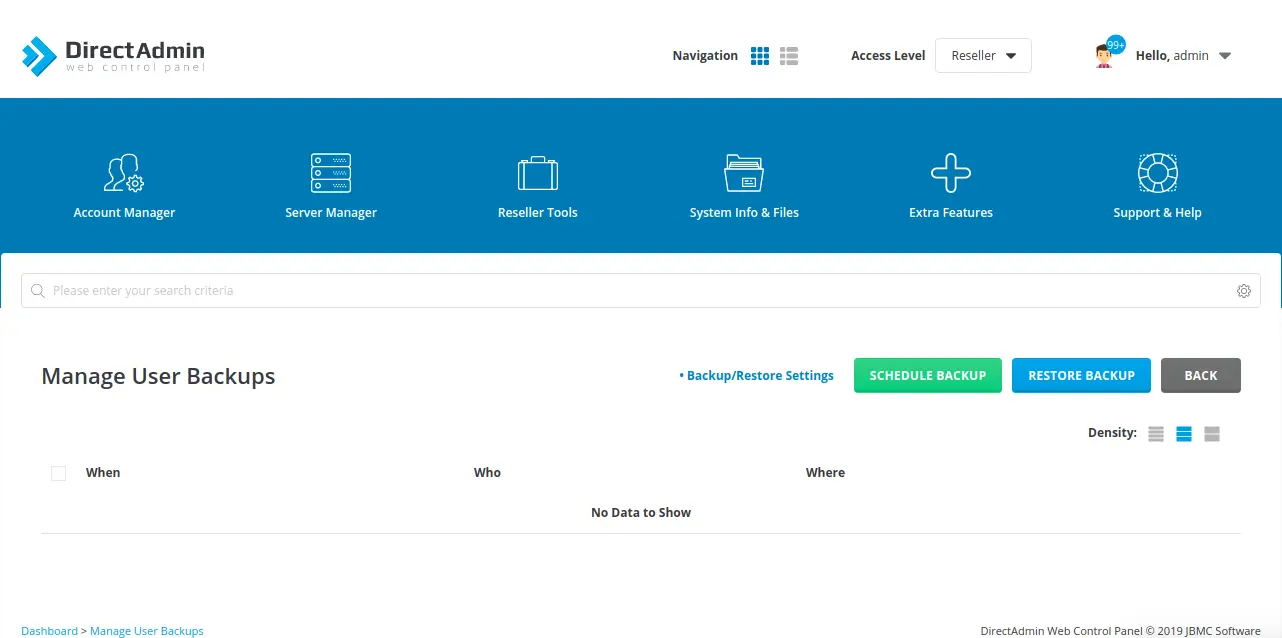
- You will receive the following page in the Reseller Panel

- Navigate to Reseller Tools -> Manage User Backups. The following screenshot contains the Restore Wizard
- Navigate to Restore Backup menu on the right hand side. The window should look like below. Proceed with the default option “Local: /home/admin/user_backups“. The account conversion tool copied the converted file to this location
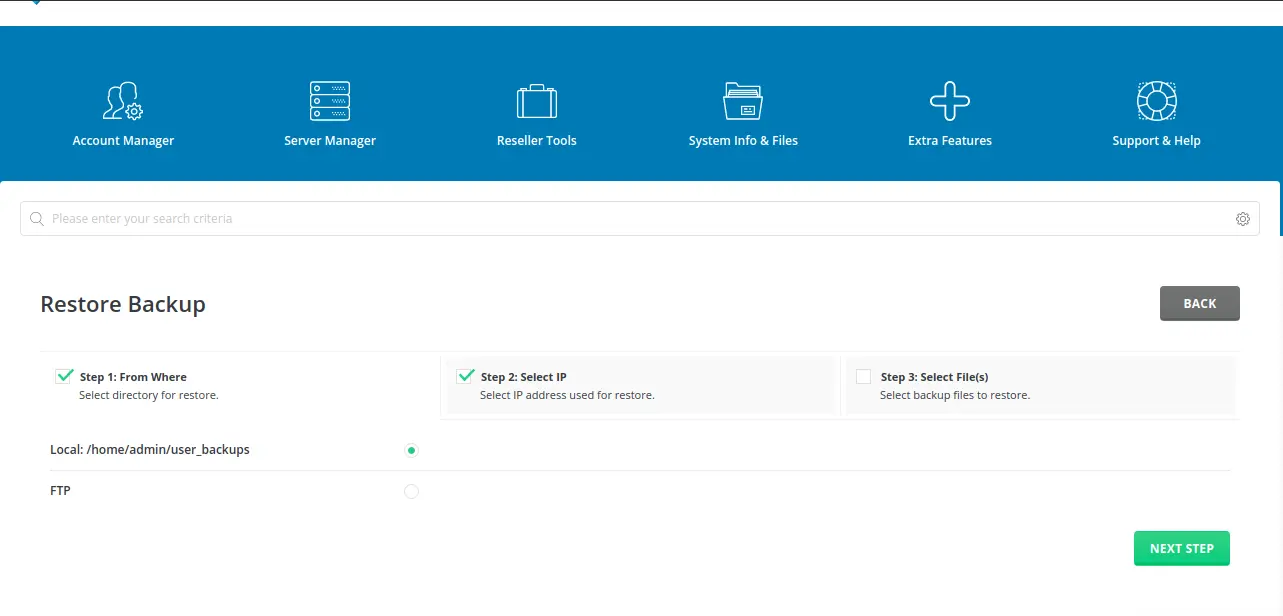
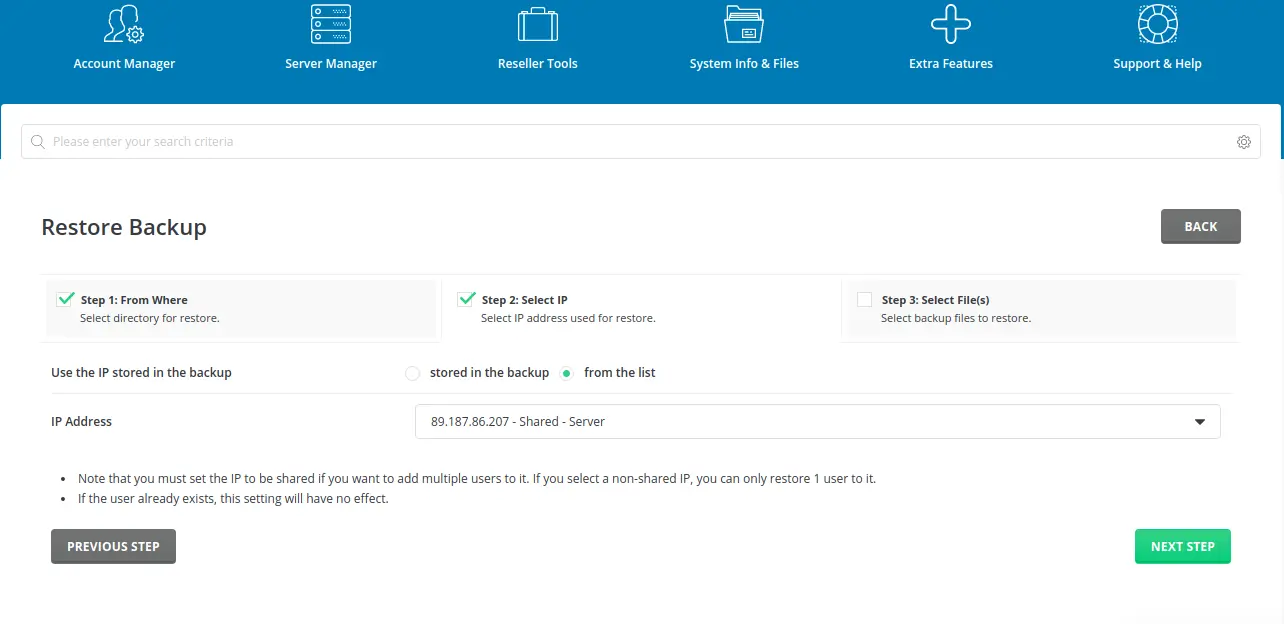
- Click Next Steps and you will receive a window like this. You need to choose the IP address in this step. Select “From the list” option and select the IP address which the domain want to host and proceed with the next step.
- This step will show the available backup files in the location “/home/admin/user_backups“. This step is a crucial one. You need to make sure the file name is the username of the account and it doesn’t have more than 10 characters. In short the filename=username and the characters <10.
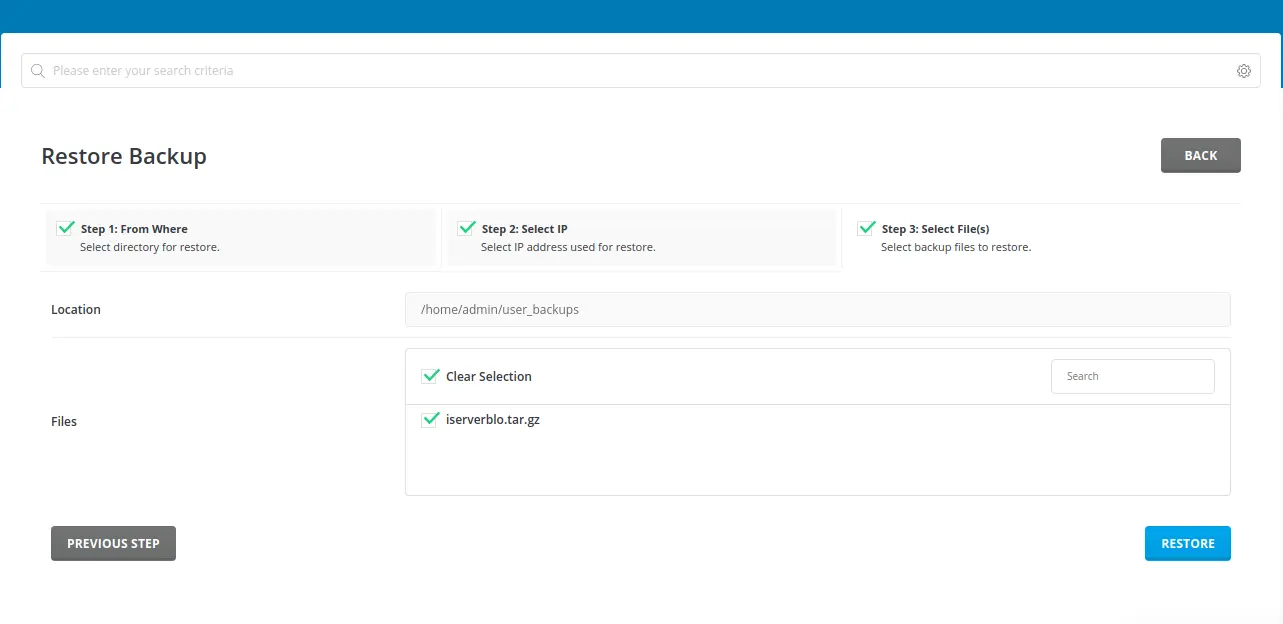
That’s it fellows. We have successfully completed the migration. If you are unable to change the username in the cPanel server due to any reason to reduce the number of characters, you just need to rename the backup file. Otherwise, the restore process will terminate.

Leave A Comment